
Workflows with Plug-in Assembly
- Boru Wang

- Jul 6, 2021
- 3 min read
Front Note
***This workflow has been using AG Utility Distributed Workflows Plug-in Assembly, which contains solutions for Microsoft Dynamics CRM that allows you to run workflows on 1:N and N:N relationships. All credit for this solution goes to the original author, Alberto Gemini.
Workflows automate business processes without a user interface. People usually use workflow processes to initiate automation that does not require any user interaction. If you have not been familiar with Microsoft workflows, please read Microsoft Workflow Overview.
Scenario
Please have a look at the following table named Reviewer/Requester. The purpose of this table is for the administrators of this app to set up reviewers for the users.
It contains several fields, including Review No., Company, User for Requester, User for Reviewer, and Default. The description of each field is listed as follows:
Review No. is auto numbering field whenever the user creates a new record;
Company is a look up field from Company entity;
User for Requester and User for Reviewer are look up fields from User entity;
Default is a Yes/No tick box to categorize if the reviewer has been set default for that specific user.

For your better understanding, the data model for this table is pasted as below.

Requirement
The requirement is that, for each company, one user can only have one default reviewer. For example, please have a look at Reviewer-1004 in the table above, Johanna Lorenz is the default reviewer for Mod Administrator in Cronus Sandbox. All other reviewers have not been set as default in this company named Cronus Sandbox.
Workflow Design

Instructions
This section will be separated into two parts. The first part is about how to install the plug-in into Power Platform, and the second part is about how to customize the workflows.
I. Install the Plug-in assembly from GitHub
1) Please go to the following link to download the plug-in assembly: https://github.com/gole1296/CRM---AG-Utilities-Distributed-Workflow .
2) If you wish to test it first, please download the managed solution; if you have already tested and want to combine this plug-in assembly with your solution together, please download the unmanaged solution. Please note that you will not be able to uninstall an unmanaged solution from your environment if it does not meet your expectation, so make sure you test it with the managed solution first.
3) Once you have downloaded it on your computer/laptop, you can go to https://make.powerapps.com/ to import this plug-in assembly. It is the same process as you import a solution into the Power Platform.
4) ** (Optional) If you have decided to use this plug-in with your solution together and have imported an unmanaged solution, now you can go to your solution and click on Add Existing -> Other -> Plug-in Assembly, to add it into your solution.
This is to make sure this plug-in assembly with combine with the solution you created and export it to use in other environments or different organizations. Once you added the plug-in assembly, it will appear in your solution like below.

II. Add workflows to Solution in Power Platform
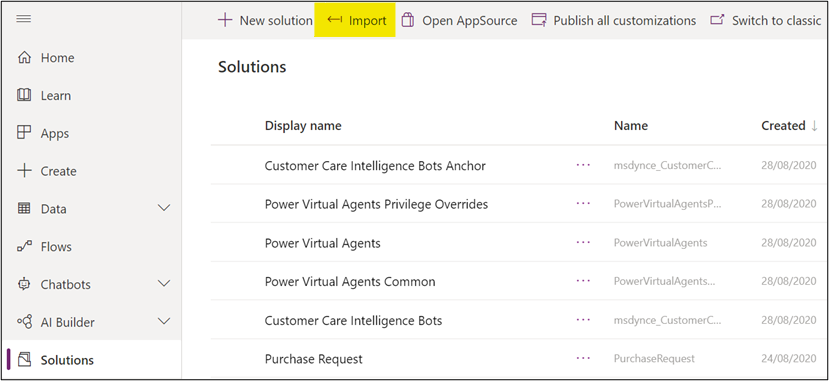
1) In your solution, please click on the three dots button next to publish button and select Switch to classic like the screenshot below.

2) In the classic mode, from the list on the left, please select Processes. (Please refer to the screenshot below.) This is where we will customize the workflows. From here, I will use my own example to illustrate the workflows. Please mind that you might be in a different situation and conditions will vary.

3) From here, we can click on New button to create workflows. Before starting to do that, let me briefly summarize the solution I had in my example. I will be creating two new fields and three workflows in the entities to finally achieve my goal as follows.
a. Field 1: Create a new filed in Common Data Services named “System_JustSelected” in Reviewer/Requester entity and make the type as Yes/No Two Options. Please make sure do not tick “Searchable” when you created this field, because this is just for workflow purpose.
b. Filed 2: Create a new field in Common Data Services named “System_SelectedCompamyForDefault” in User entity and make the type as Lookup field from User. Please make sure do not tick “Searchable” when you created this field, because this is just for workflow purpose.
c. Workflow 1: Workflow - Reviewers - On Default = Yes, Deactivate Other Records

d. Workflow 2: Child Workflow - Reviewers - Set Default to No

e. Workflow 3: Workflow - User - Set Child Reviewer records Default to No

4) After each workflow being created, please do not forget to click on Activate button to make the workflow to run.

5) If you wish to edit the workflow after creating them, you need to deactivate them and then edit again.


Comments